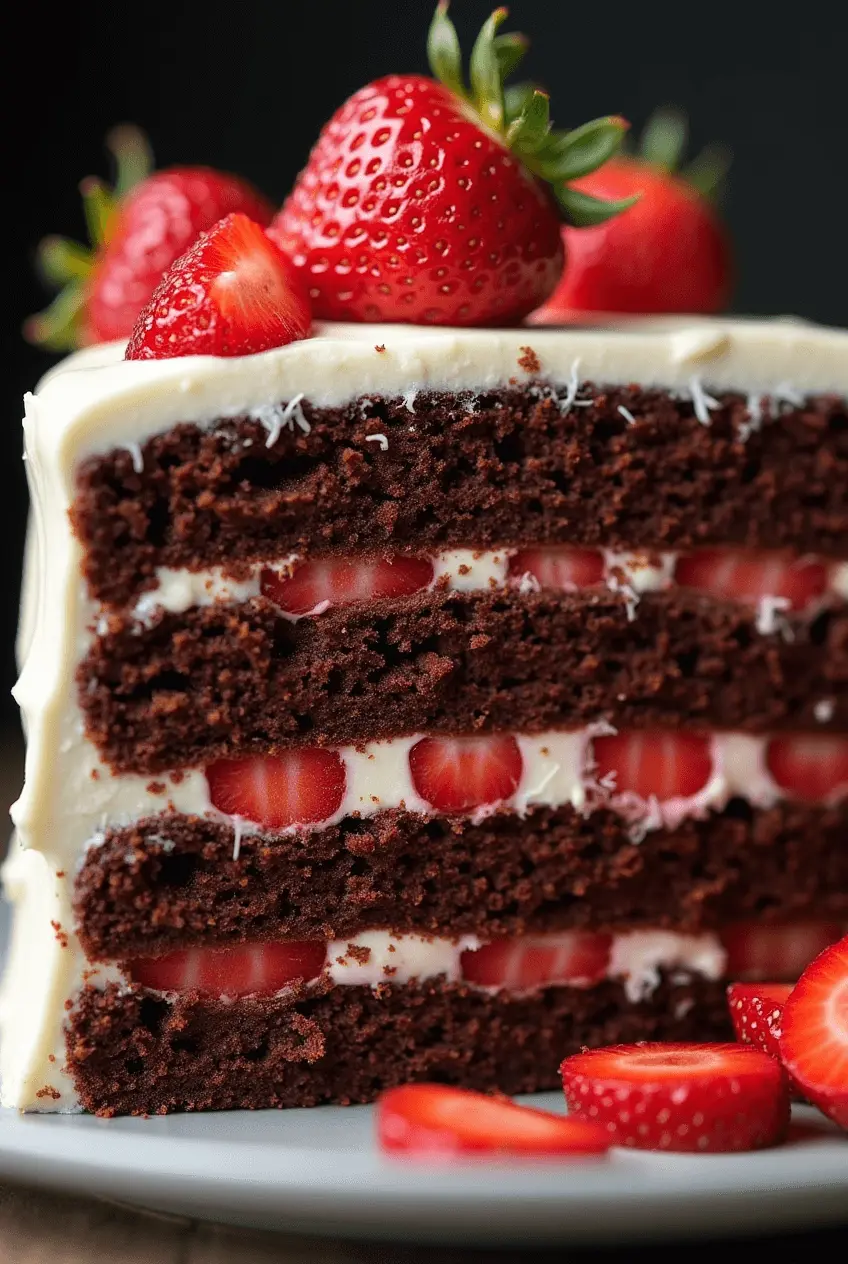
The strawberries and chocolate go hand in hand in dessert heaven.
I will never forget the first time I bit into a warm chocolate cake layered with fresh strawberries; it was like my taste buds threw a party.. I therefore always reach for this Strawberry Chocolate Cake when I’m craving something decadent without being overly rich.. And guess what? You don’t need a culinary degree to make it.
This recipe is for everyone who’s ever stared at a kitchen disaster and thought, ‘I give up’ —you know who you are. It’s forgiving, requires zero fancy tools, and—bonus!—it’s so easy your kids will beg to help. Don’t own a stand mixer? Grab a whisk—it’ll build arm strength and a killer cake. Forgot parchment paper? Aluminum foil’s your last-minute hero. Trust me, I’ve done it all.
Whether it’s your kid’s 5th birthday, a ‘just because’ date night, or you’re staring down the fridge at 10 PM thinking, ‘I need chocolate,’ this cake’s got you covered. Let’s make something delicious together.”
Ingredients You’ll Need (And Why They Matter)
Let’s gather your baking squad: ingredients and tools that work together like a well-rehearsed band. No fancy gadgets here—just stuff you can find at any grocery store or improvise with.
For the Chocolate Cake Layers
“This isn’t just cake—it’s a chocolate hug in every bite.”
- All-purpose flour : The backbone of your cake. No cake flour? Don’t panic—AP flour works just fine.
- Cocoa powder : Use the good stuff! I swear by Dutch-processed cocoa for deeper chocolate vibes.
- Sugar & butter : The sweet-and-rich duo that makes this cake tender and moist. Pro tip: Let your butter warm up to room temp—it creams better!
- Eggs : Nature’s glue. Room temperature eggs blend smoother (no fridge-cold surprises!).
- Baking powder : Your secret weapon for a light, airy crumb. Don’t skip it—unless you want a brick-like cake.
- Vanilla extract : Skip the imitation stuff. Real vanilla makes all the difference.
- Milk or buttermilk : Buttermilk is my go-to—it adds tangy richness and keeps the cake ultra-moist. No buttermilk? Add a splash of lemon juice to regular milk.
For the Strawberry Filling & Decoration
“Fresh strawberries are the unsung heroes here—sweet, juicy, and totally worth the mess.”
- Fresh strawberries : Buy ripe, fragrant ones. Avoid rock-hard berries—they’re all crunch and no flavor.
- For filling : Dice or slice them thinly. Toss with a spoonful of sugar to draw out the juices.
- For layering : Save some chopped berries to sandwich between the cake layers.
- For garnish : Reserve the most perfect strawberries for the top. A little shine = instant bakery vibes.
For the Whipped Cream Frosting
“This isn’t gloopy frosting—it’s cloud-like, melt-in-your-mouth magic.”
- Heavy whipping cream : Chill the bowl and whisk before you start. Cold = stiff peaks.
- Powdered sugar : For sweetness without grit. No clumps? Sift it first.
- Vanilla extract : Again, real vanilla = real results.
Tools You’ll Actually Use
“No fancy gear? No problem. Here’s what you probably already own:”
- Mixing bowls : Big and small. I use my grandma’s chipped Pyrex bowl—it’s seen a hundred cakes.
- Electric mixer : A hand mixer works just fine. (If you’re mixing by hand, arm day, baby.)
- Spatula : My silicone one’s my hero—it scrapes every last drop of batter.
- Measuring cups/spoons : Accuracy matters, but don’t stress over a 1/4 tsp. Baking’s forgiving!
- 9-inch cake pans : Two of ’em. If they’re non-stick, still line with parchment paper. Trust me—your cakes will slide out like a charm.

Ingredients You’ll Need (And Why They Matter)
Let’s gather your baking squad: ingredients and tools that work together like a well-rehearsed band. No fancy gadgets here—just stuff you can find at any grocery store or improvise with.
For the Chocolate Cake Layers
“This isn’t just cake—it’s a chocolate hug in every bite.”
- All-purpose flour : The backbone of your cake. No cake flour? Don’t panic—AP flour works just fine. Pro tip: If you’re out of flour, don’t substitute with cornstarch. Trust me—I tried once, and the result was… dense.
- Cocoa powder : Use the good stuff! I swear by Dutch-processed cocoa for deeper chocolate vibes. If all you’ve got is regular cocoa, add a pinch of espresso powder to boost the flavor.
- Sugar & butter : The sweet-and-rich duo that makes this cake tender and moist. Room-temp butter is key! If yours is rock-hard, zap it in the microwave for 10 seconds. (I’ve done worse.)
- Eggs : Nature’s glue. Room temperature eggs blend smoother (no fridge-cold surprises!). If you’re vegan, try a mashed banana or flax egg. It won’t be the same, but it’ll work in a pinch.
- Baking powder : Your secret weapon for a light, airy crumb. Don’t skip it—unless you want a brick-like cake.
- Vanilla extract : Skip the imitation stuff. Real vanilla makes all the difference. Once, I used almond extract by accident. It was… interesting.
- Milk or buttermilk : Buttermilk is my go-to—it adds tangy richness and keeps the cake ultra-moist. No buttermilk? Add a splash of lemon juice to regular milk. I’ve faked it plenty of times.
For the Strawberry Filling & Decoration
“Fresh strawberries are the unsung heroes here—sweet, juicy, and totally worth the mess.”
- Fresh strawberries : Buy ripe, fragrant ones. Avoid rock-hard berries—they’re all crunch and no flavor.
- For filling : Dice or slice them thinly. Toss with a spoonful of sugar to draw out the juices. If they’re tart, add an extra pinch.
- For layering : Save some chopped berries to sandwich between the cake layers.
- For garnish : Reserve the most perfect strawberries for the top. A little shine = instant bakery vibes.
For the Whipped Cream Frosting
“This isn’t gloopy frosting—it’s cloud-like, melt-in-your-mouth magic.”
- Heavy whipping cream : Chill the bowl and whisk before you start. Cold = stiff peaks.
- Powdered sugar : For sweetness without grit. No clumps? Sift it first.
- Vanilla extract : Again, real vanilla = real results.
Tools You’ll Actually Use
“No fancy gear? No problem. Here’s what you probably already own:”
- Mixing bowls : Big and small. I use my grandma’s chipped Pyrex bowl—it’s seen a hundred cakes.
- Electric mixer : A hand mixer works just fine. (If you’re mixing by hand, arm day, baby.)
- Spatula : My silicone one’s my hero—it scrapes every last drop of batter.
- Measuring cups/spoons : Accuracy matters, but don’t stress over a 1/4 tsp. Baking’s forgiving!
- 9-inch cake pans : Two of ’em. If they’re non-stick, still line with parchment paper. Trust me—your cakes will slide out like a charm.
Tips for Beginners: How to Nail This Cake (Even If You’ve Burned a Cookie Before)
Baking doesn’t have to feel like rocket science. Spoiler: I’ve burned plenty of cookies, overmixed batters, and accidentally used salt instead of sugar. (True story.) But here’s the good news—these tips will help you avoid my mistakes and make this Strawberry Chocolate Cake look like it came from a bakery. Let’s go!
Oops, I Burned the Butter: How to Fix Common Mistakes
“Baking is part science, part chaos. Here’s how to salvage the mess.”
- Overmixing = Dense Cake
Stir until just combined. Overmixing activates gluten, which makes cake tough. Trust me, I’ve done it—my first attempt tasted like a chocolate brick. - Cold Oven? Big No-No
Always preheat your oven! A cold oven = sad, flat cake. I learned this the hard way when I rushed and skipped preheating. The cake deflated like a sad balloon. - Frosting on Warm Layers? Disaster Waiting to Happen
Let cakes cool completely before frosting. Warm layers = melted whipped cream. Once, I rushed this step and ended up with frosting that slid off like a landslide. Not cute.
Make It Your Own: Customizing the Recipe
“This cake is a blank canvas. Paint it gluten-free, vegan, or extra-chocolaty—your call!”
- Gluten-Free Magic
Swap regular flour for a 1:1 gluten-free blend. I’ve tested this with Bob’s Red Mill, and it worked like a charm. Pro tip: Add 1/4 tsp xanthan gum if your blend doesn’t include it. - Dairy-Free? No Problem
Replace butter with coconut oil (solid, not melted!) and use coconut whipped cream for frosting. Warning: Chill the bowl first—coconut cream gets melty fast. - Extra-Chocolaty Upgrade
Drizzle ganache over the top! Melt dark chocolate chips with coconut cream or regular cream. Pour it on while the cake’s still chilled—it’ll set into a glossy shine.
Storing & Serving: Keep It Fresh (Or Eat It All Now—No Judgments)
“Leftovers are rare in my house, but just in case…”
Serve It How You Like It
Chilled = firm, cakey texture. Room temp = soft, melty bliss. I’m team room temp, but my husband loves it cold. Debate over dessert? Always worth it.Decorating Ideas: Making Your Strawberry Chocolate Cake Instagram-Worthy
Refrigerate for 3 Days
Store leftovers in an airtight container. The whipped cream holds up better chilled, but the cake tastes best at room temp. Pro tip: Let it sit out for 20 minutes before serving—it softens the texture.
Freeze for Later
Wrap unfrosted layers in plastic wrap and freeze for up to 2 months. I do this before parties—I assemble the cake the day before and frost it fresh.
Serve It How You Like It
Chilled = firm, cakey texture. Room temp = soft, melty bliss. I’m team room temp, but my husband loves it cold. Debate over dessert? Always worth it.
Experimenting with Edible Flowers or Gold Leaf
Creative Layering Techniques: Make Your Cake a Work of Art
“Let’s turn your cake into a showstopper—no pastry school degree required!”
- Striped Sides: The Oooh-Ahhh Moment
Instead of hiding the strawberry filling between layers, spread it on the sides for a peekaboo effect. Here’s how:
After stacking your cake layers, use a small offset spatula to smear strawberry filling along the edges.
Don’t stress about precision—it’s more charming if it looks “messy.”
Chill the cake for 10 minutes, then frost over it. The strawberry streaks will peek through like a watercolor painting!
Pro tip: Once, I accidentally smeared filling on the sides while rushing to frost a cake. My guests thought it was intentional and called it “rustic-chic.” Moral of the story: Own the mess!
- Clear Cake Stand Magic
Invest in a clear acrylic or glass cake stand. It’s like giving your cake its own spotlight!
Pro tip: If you don’t own one, use a glass serving plate or even a vintage picture frame (seriously—it works!).
Bonus: The contrast of dark chocolate layers and bright strawberries against a clear stand will make your Instagram photos pop.Here we suggest this hearty meal for spring nights: beef pieces with creamy Parmesan crusts.


2 thoughts on “Easy Strawberry Chocolate Cake Recipe for Beginners””